Using Mockster in Microsoft Power Platform
Mockster is made for citizen develpers. In this guide you'll learn how to create complex data structures with Mockster to help with your app development efforts. 🚀
Create your first set of data
Getting started is easy. For our first example, let's create some company data in Microsoft Dataverse.
- Create a new Power Automate workflow.
- Select
Manually trigger a flowfor the trigger. - Add
Mocksters Get company mockdata-action. For more information about the endpoint, see 🏢 Companies. - Add an
Add a new row-action from Dataverse connector. - Select
Accountsas table name. - Fill fields with data from the dynamic content. Adding your first value will wrap the action in a loop.
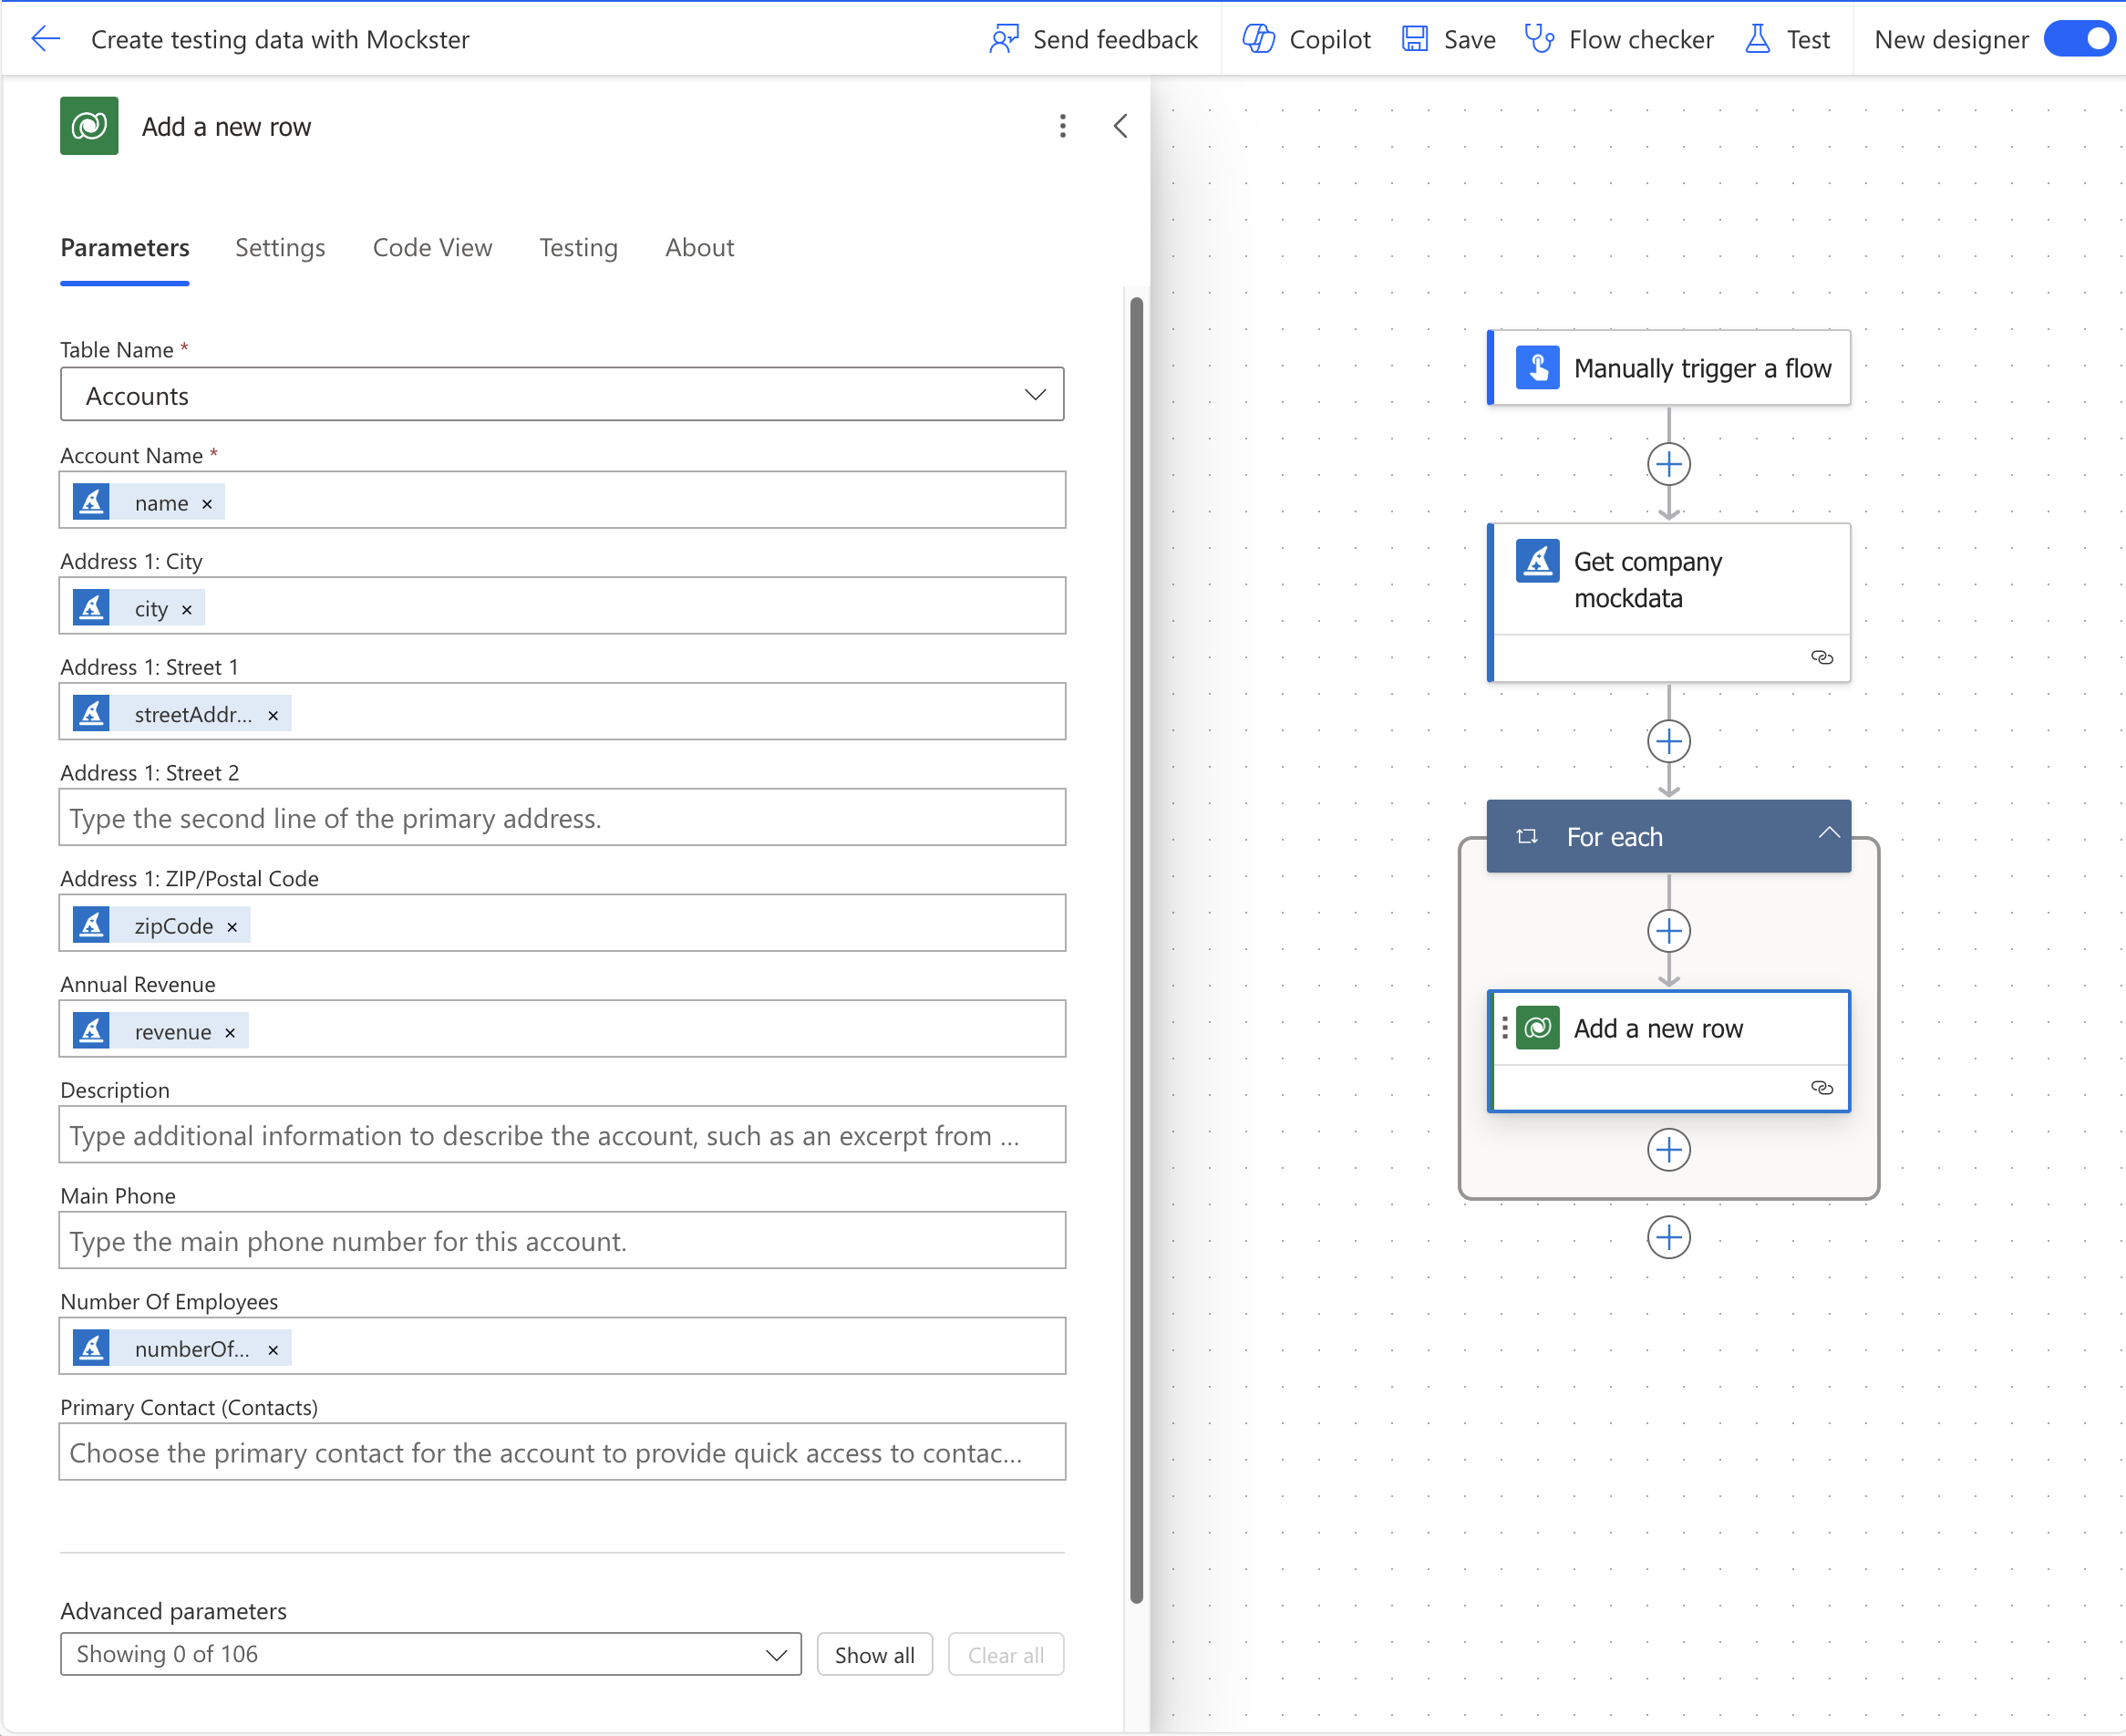
That's it! Now you got a workflow to create some company data. By default Mockster will return 10 rows of data. This yoy may of course change and create as much as you want.
Randomizing the count of rows created
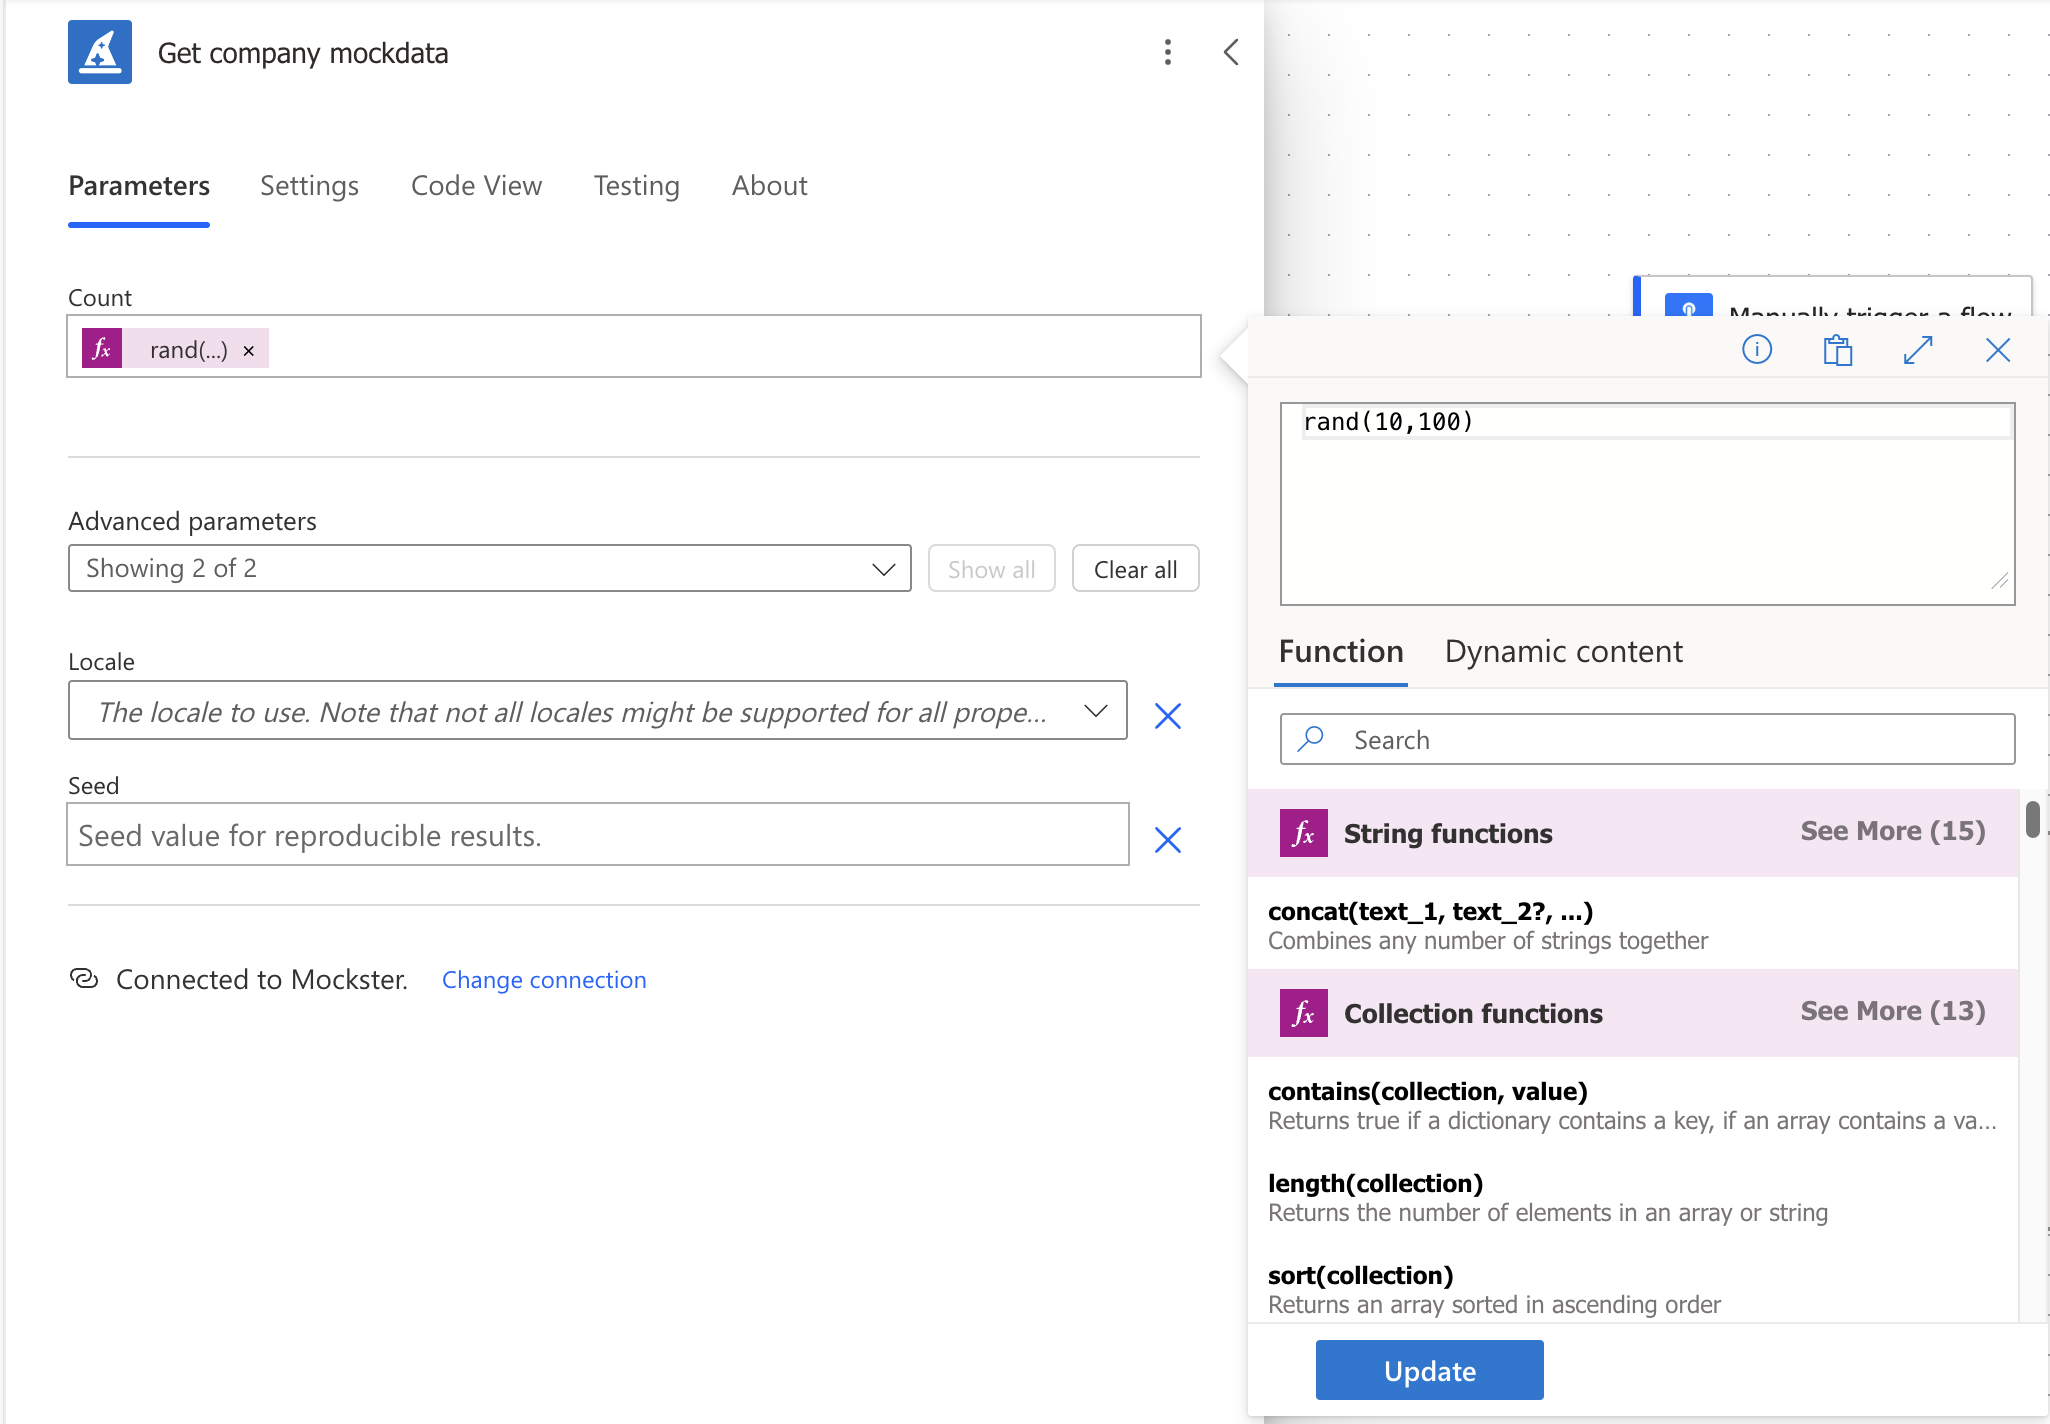
All Mocksters endpoints include a count parameter. You can manually change this from the default value of 10 to what ever static value you prefer. If you'd like some randomness in this as well, you can use rand() expression to accomplish this.
rand() takes two parameters - minimum value and maximum value. With this you can randomize your workflow to create x amount of rows. For example, rand(10, 100) will return a value between 10 and 100.
Create data for relationships
Simple data is all fun and nice, but the true power comes from being able to create complex data structures and mock data for them. In the following examples we'll explore how you might go about doing that.
Create data for One-to-Many relationship
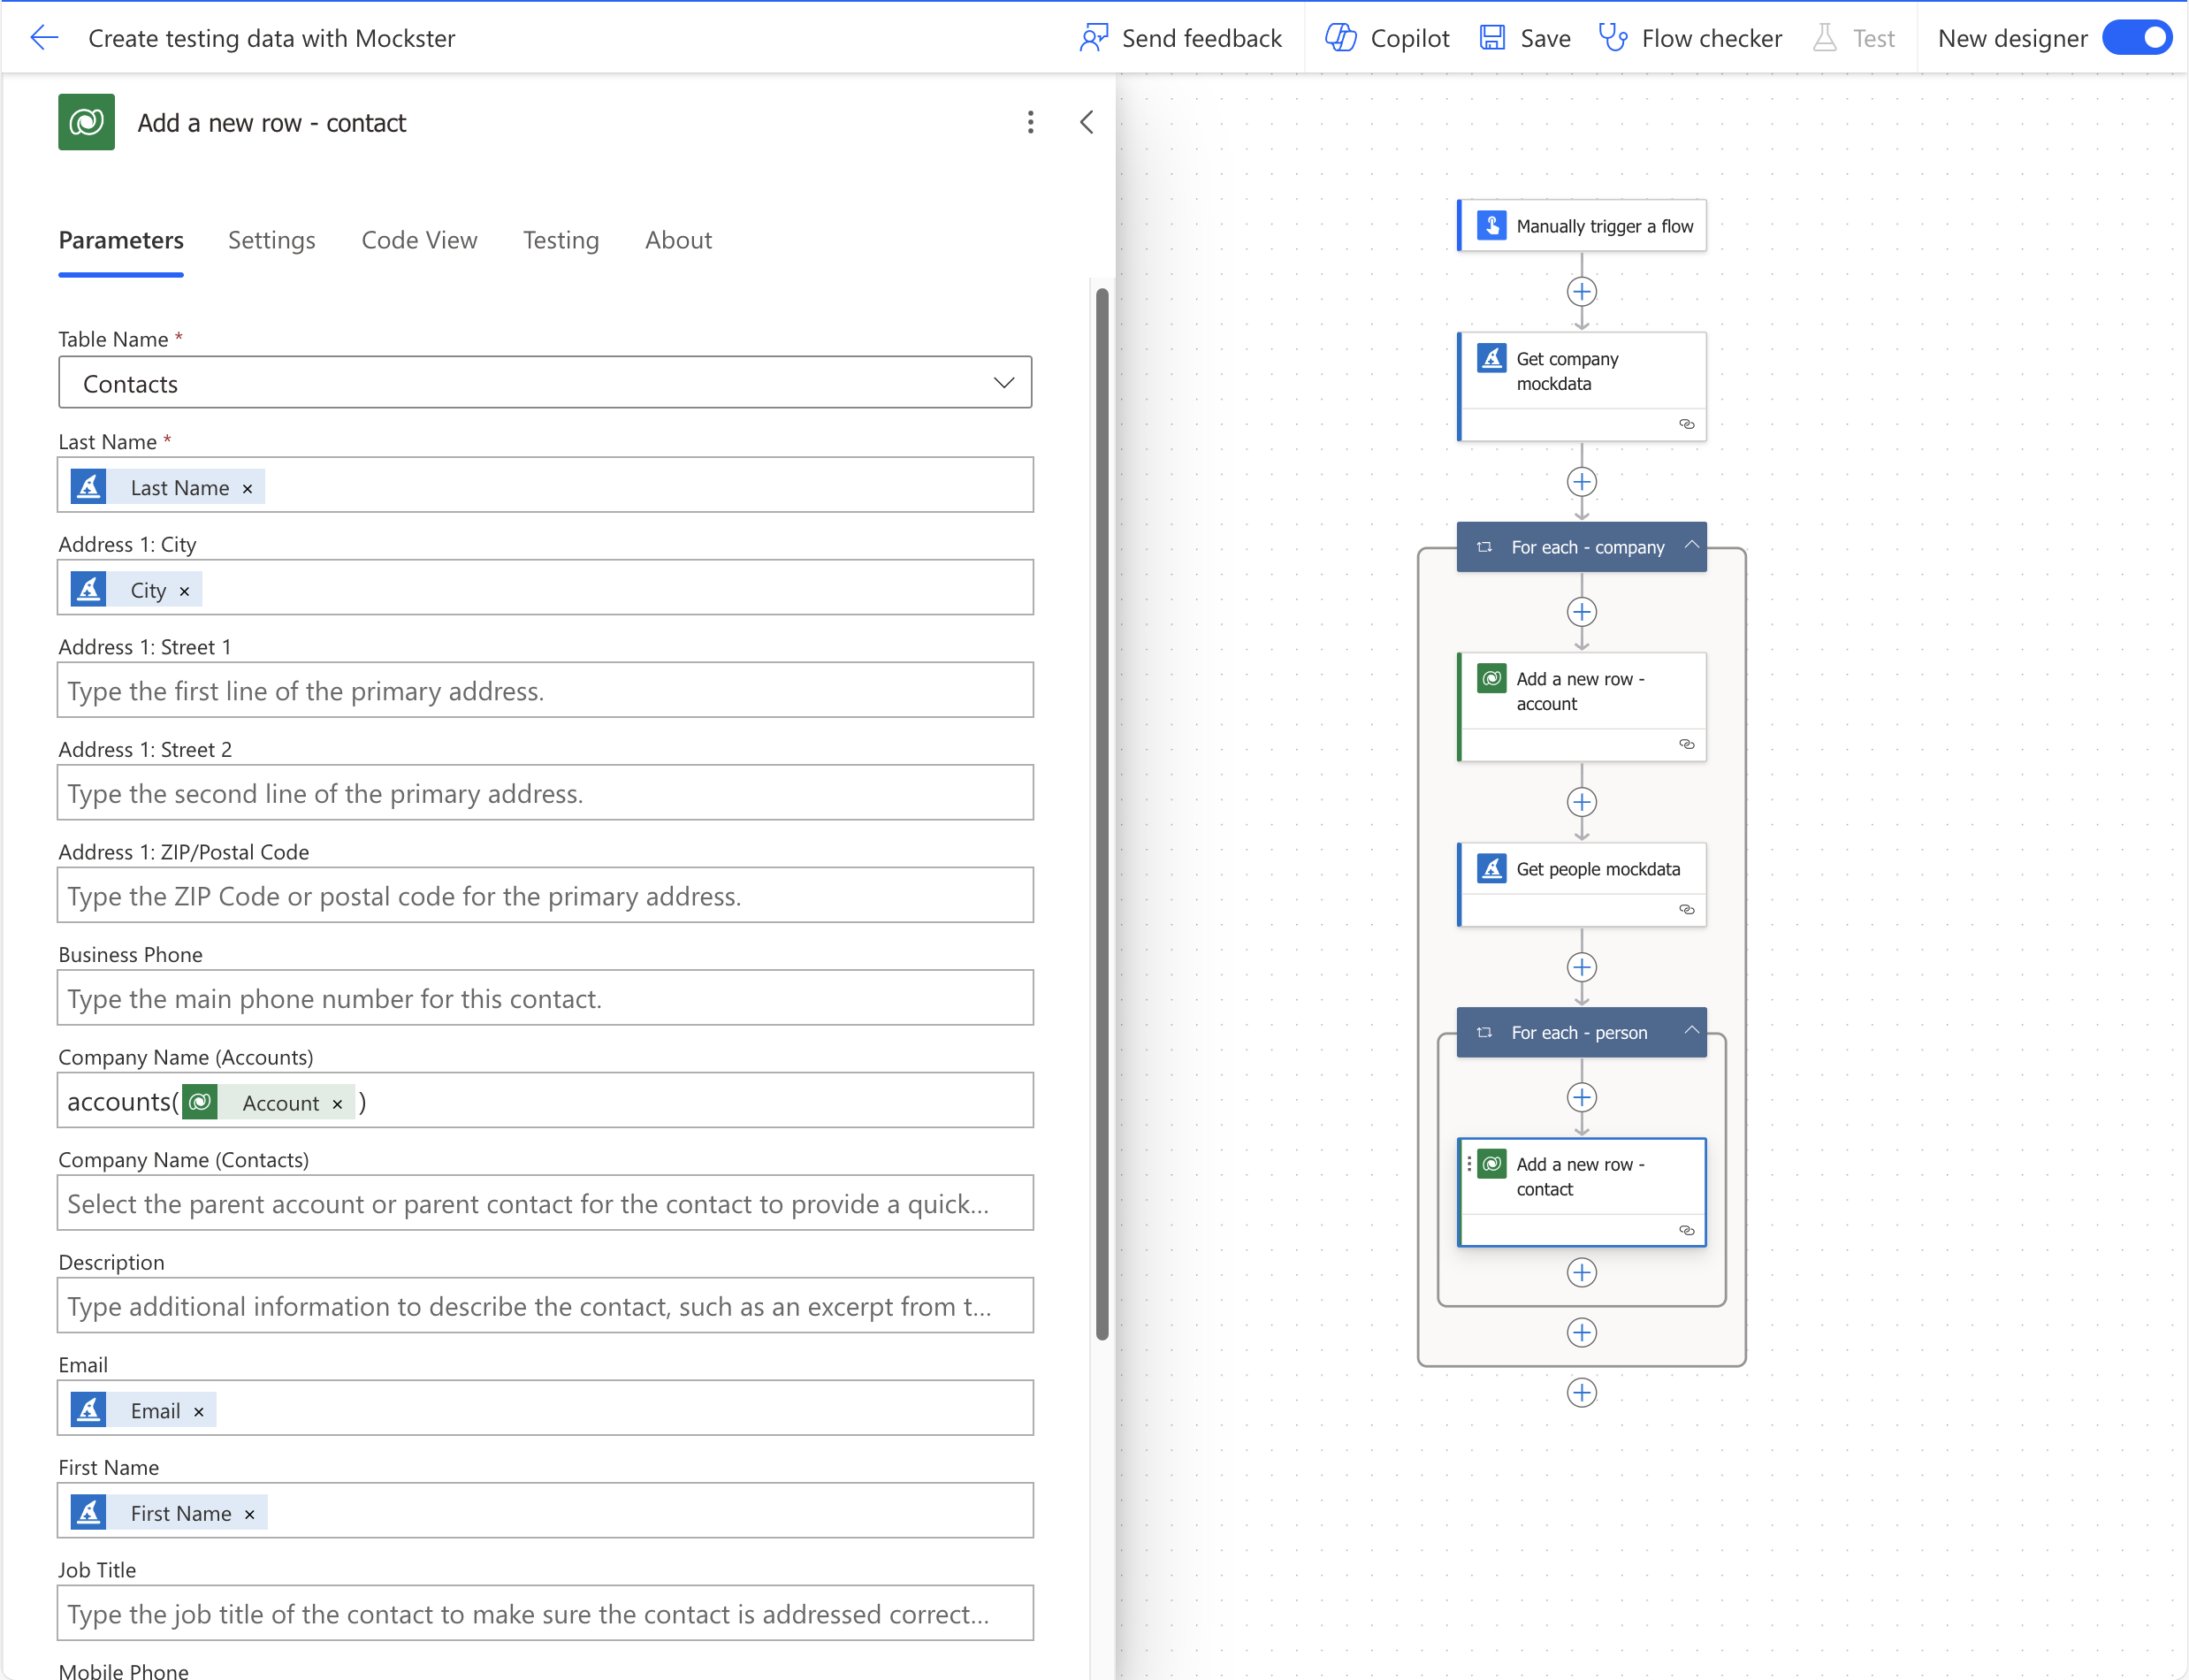
First, let's tackle 1:N relationship. We'll use the same start as before, we'll create some companies. While creating companies, let's also call the 🧍🏻 Persons endpoint to add contacts to those companies.
- Create a new Power Automate workflow.
- Select
Manually trigger a flowfor the trigger. - Add Mocksters
Get company mockdata-action. For more information about the endpoint, see 🏢 Companies. - Add an
Add a new row-action from Dataverse connector. - Select
Accountsas table name. - Fill fields with data from the dynamic content. Adding your first value will wrap the action in a loop.
- Inside the loop, add
Get people mockdata-action from Mockster. For more information about the endpoint, see 🧍🏻 Persons. - In the
countparameter, add expressionrand(1,10)to randomly create between 1 and 10 contacts per company. - Add
Add a new row-action from Dataverse connector again. - Select
Contactsas table name. - Fill fields with data from the dynamic content. Adding your first value will wrap the action in a loop.
- For
Company Name (Accounts)addaccounts(). Inside the parentheses addAccountfrom dynamic content. This is the magic part for this action. This will create the relationship between a contact and an account.
With this, you've now created a workflow to create some companies as well as contacts for them. That's awesome 😎!
Create data for Many-to-Many relationship
Many to many relationship can be used in all sorts of things, but a common scenario is to add tags to some record. For this example I've created a new table in Dataverse called Tag. This table has N:N relationship with Account table. I'll first create records and then associate them with each other. Tags are in this case nouns from the 🆒 Words endpoint.
- Create a new Power Automate workflow.
- Select
Manually trigger a flowfor the trigger. - Add
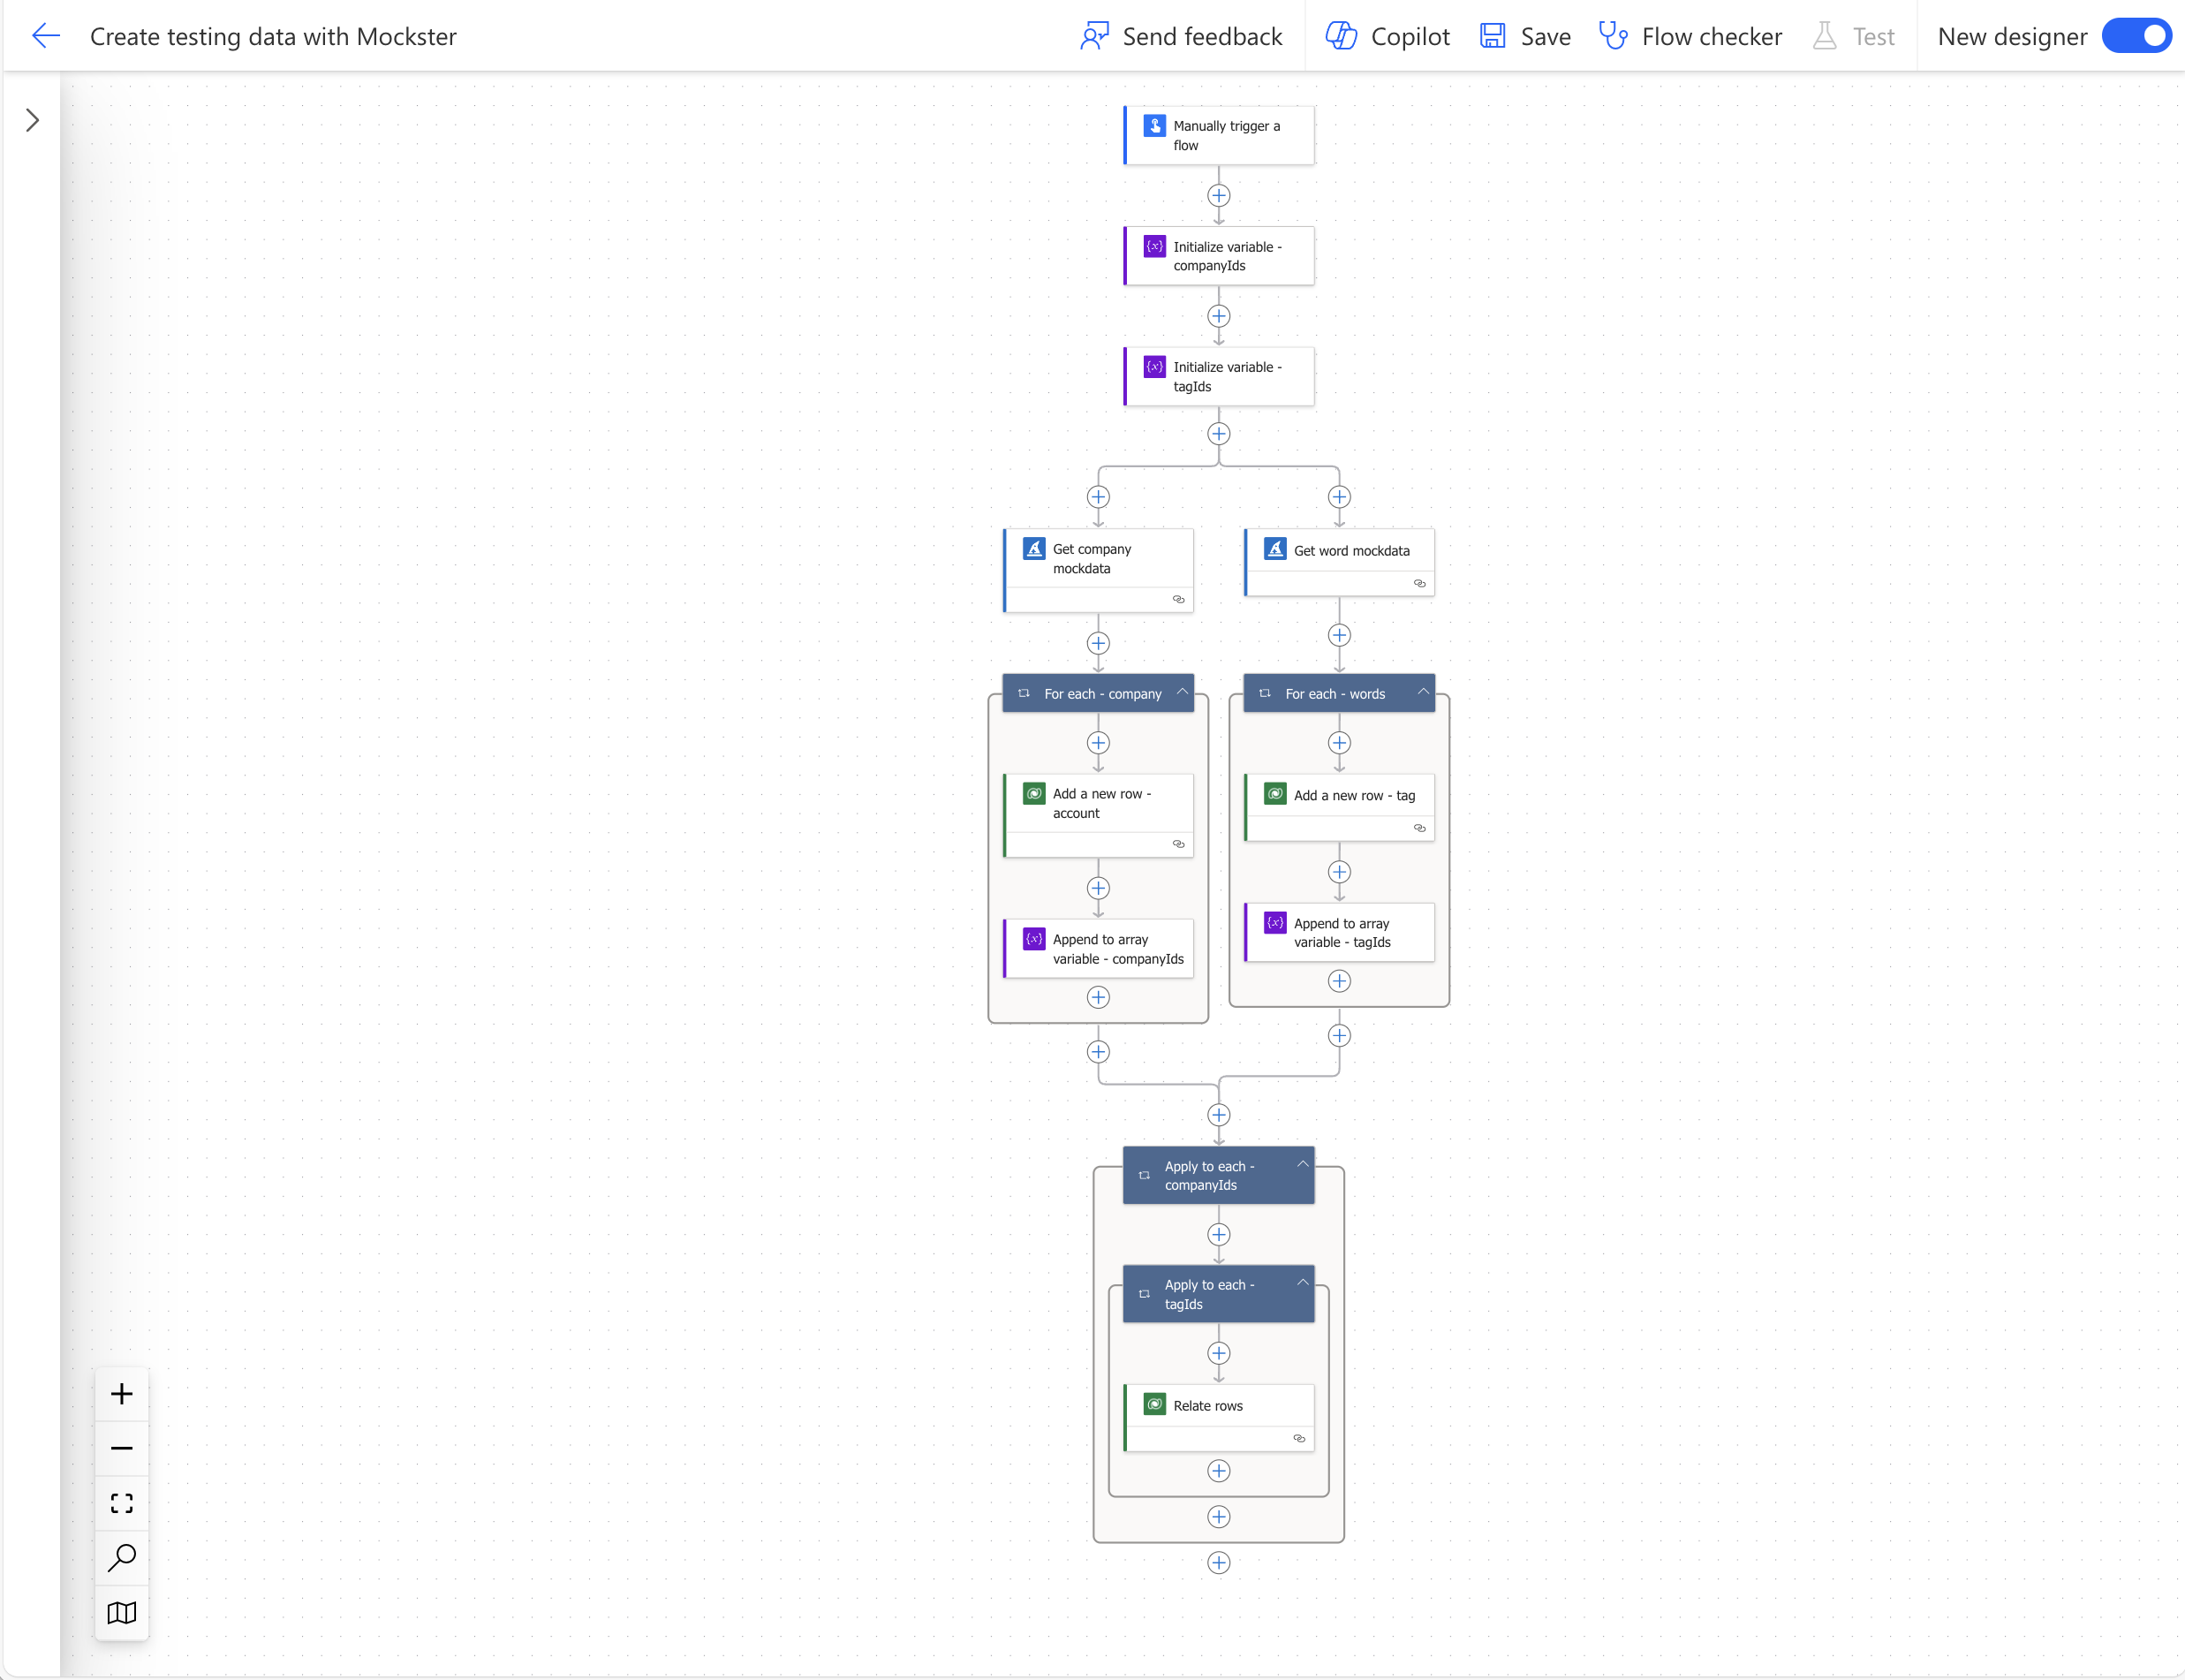
Initialize variable-action. Type is array and namecompanyIds. We'll add all created account IDs to this variable.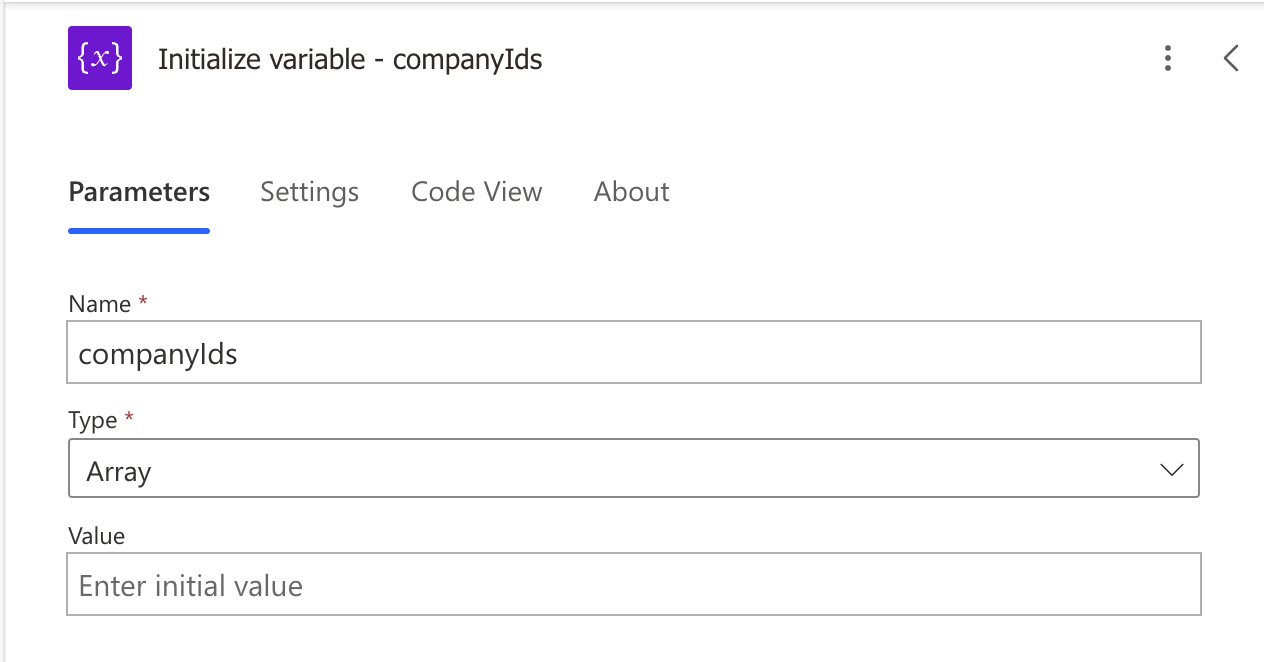
- Add another
Initialize variable-action. Type is array and nametagIds. We'll add all created tag IDs to this variable. - Add Mocksters
Get company mockdata-action. For more information about the endpoint, see 🏢 Companies. - Add an
Add a new row-action from Dataverse connector. - Select
Accountsas table name. - Fill fields with data from the dynamic content. Adding your first value will wrap the action in a loop.
- Add
Append to array variable-action. Append created account id to this variable from dynamic content.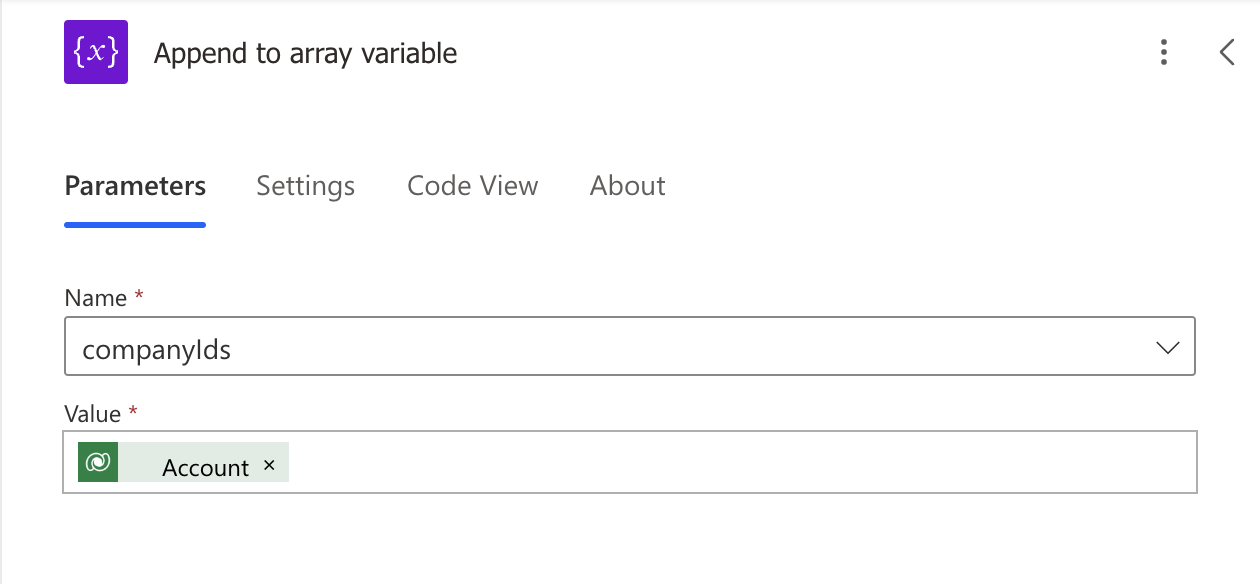
- Outside the loop, add
Get word mockdata-action. For more information about the endpoint, see 🏢 Words. - Add an
Add a new row-action from Dataverse connector. - Select
Tagsas table name. - Fill fields with data from the dynamic content. Adding your first value will wrap the action in a loop.
- Add
Append to array variable-action. Append created tag OData Id to this variable from dynamic content. OData Id is needed to relate rows together in later steps.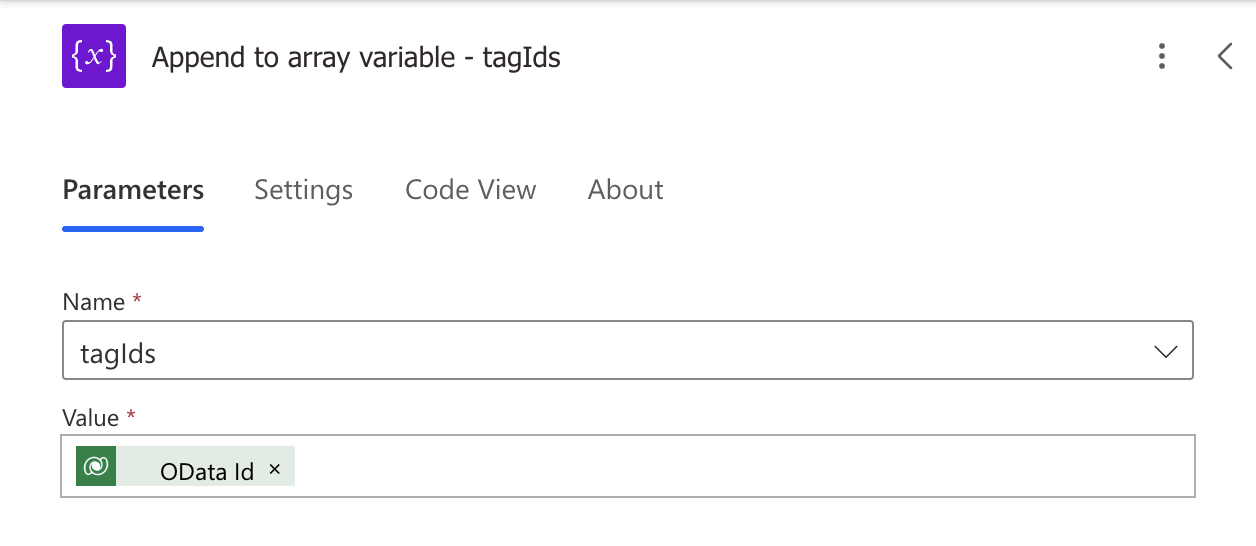
- Outside the loop, add an
Apply to each-action. Items parameter is going to be our generated companyIds. This means we'll loop trough those IDs. - Inside the created loop, add another
Apply to each-action. Now comes some magic. In the items parameter add the following expression:take(variables('tagIds'),rand(1,10)). This expression takes from 1 to 10 tag IDs. This will randomize the assigning of tags a little bit, so not all accounts have all the tags. - Inside the nested loop, add
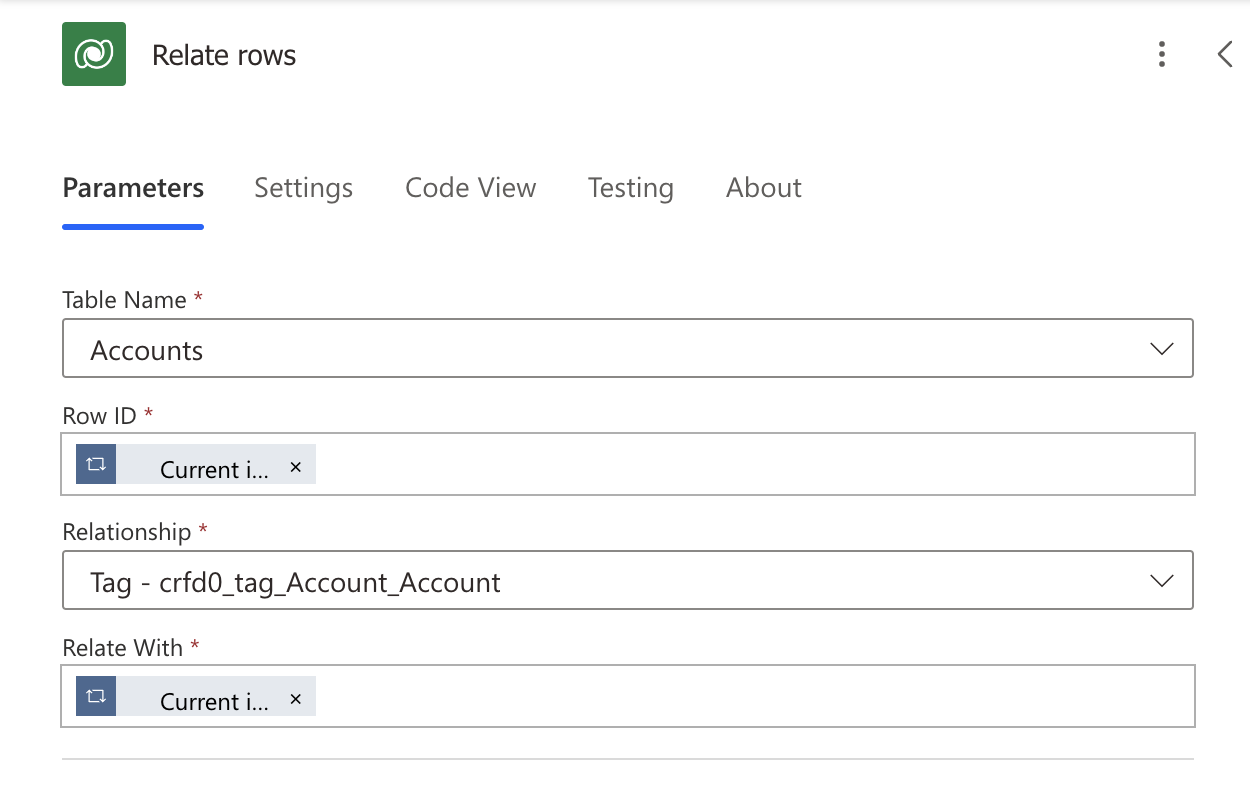
Relate rowsfrom the Dataverse connector. - Fill in the action as follows:
- Table Name:
Accounts - Row ID:
Current itemfromApply to each - companyIdsloop. - Relationship: N:N relationship you created between Account and Tag table.
- Relate With:
Current itemfromApply to each - tagIdsloop.
- Table Name:
Now you are ready to run your flow. This creates 10 accounts with 1 to 10 tags attached to them. In the image below I've made some steps paraller to each other, just to fit screenshot better.
Use Mockster in Microsoft Power Apps
With Power Apps, there are two options. You can prepopulate your database with Power Automate as described abowe, or you can use Mocster directly. With the latter approach you can populate galleries for example. Of course this means the data is not persisted and changes each time the gallery is reloaded. Let's get started!
- Create a new canvas app in Power Apps.
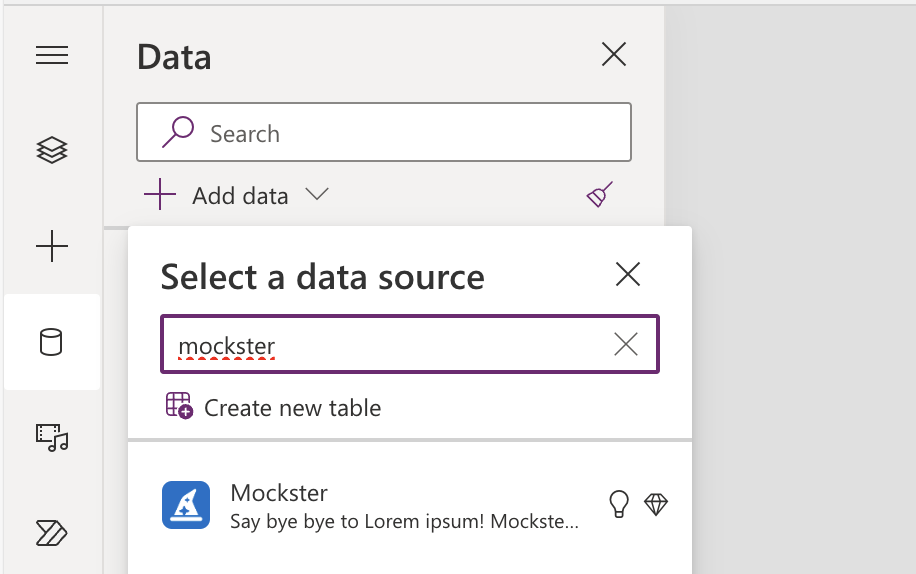
- Add Mockster to the app from the Data menu.
- Add a gallery to the canavas from the insert menu.
- In the gallerys
itemsproperty addMockster.GetCompanies()via the fuction row. For more information about the endpoint, see 🏢 Companies.
- In the properties pane on the right, set Layout as
Title, subtitle, and body. - In the properties pane, click on the fields property to modify fields in the gallery.
- Set values as follows:
- Body1:
catchPhrase - Subtitle1:
city - Title1:
name
- Body1:
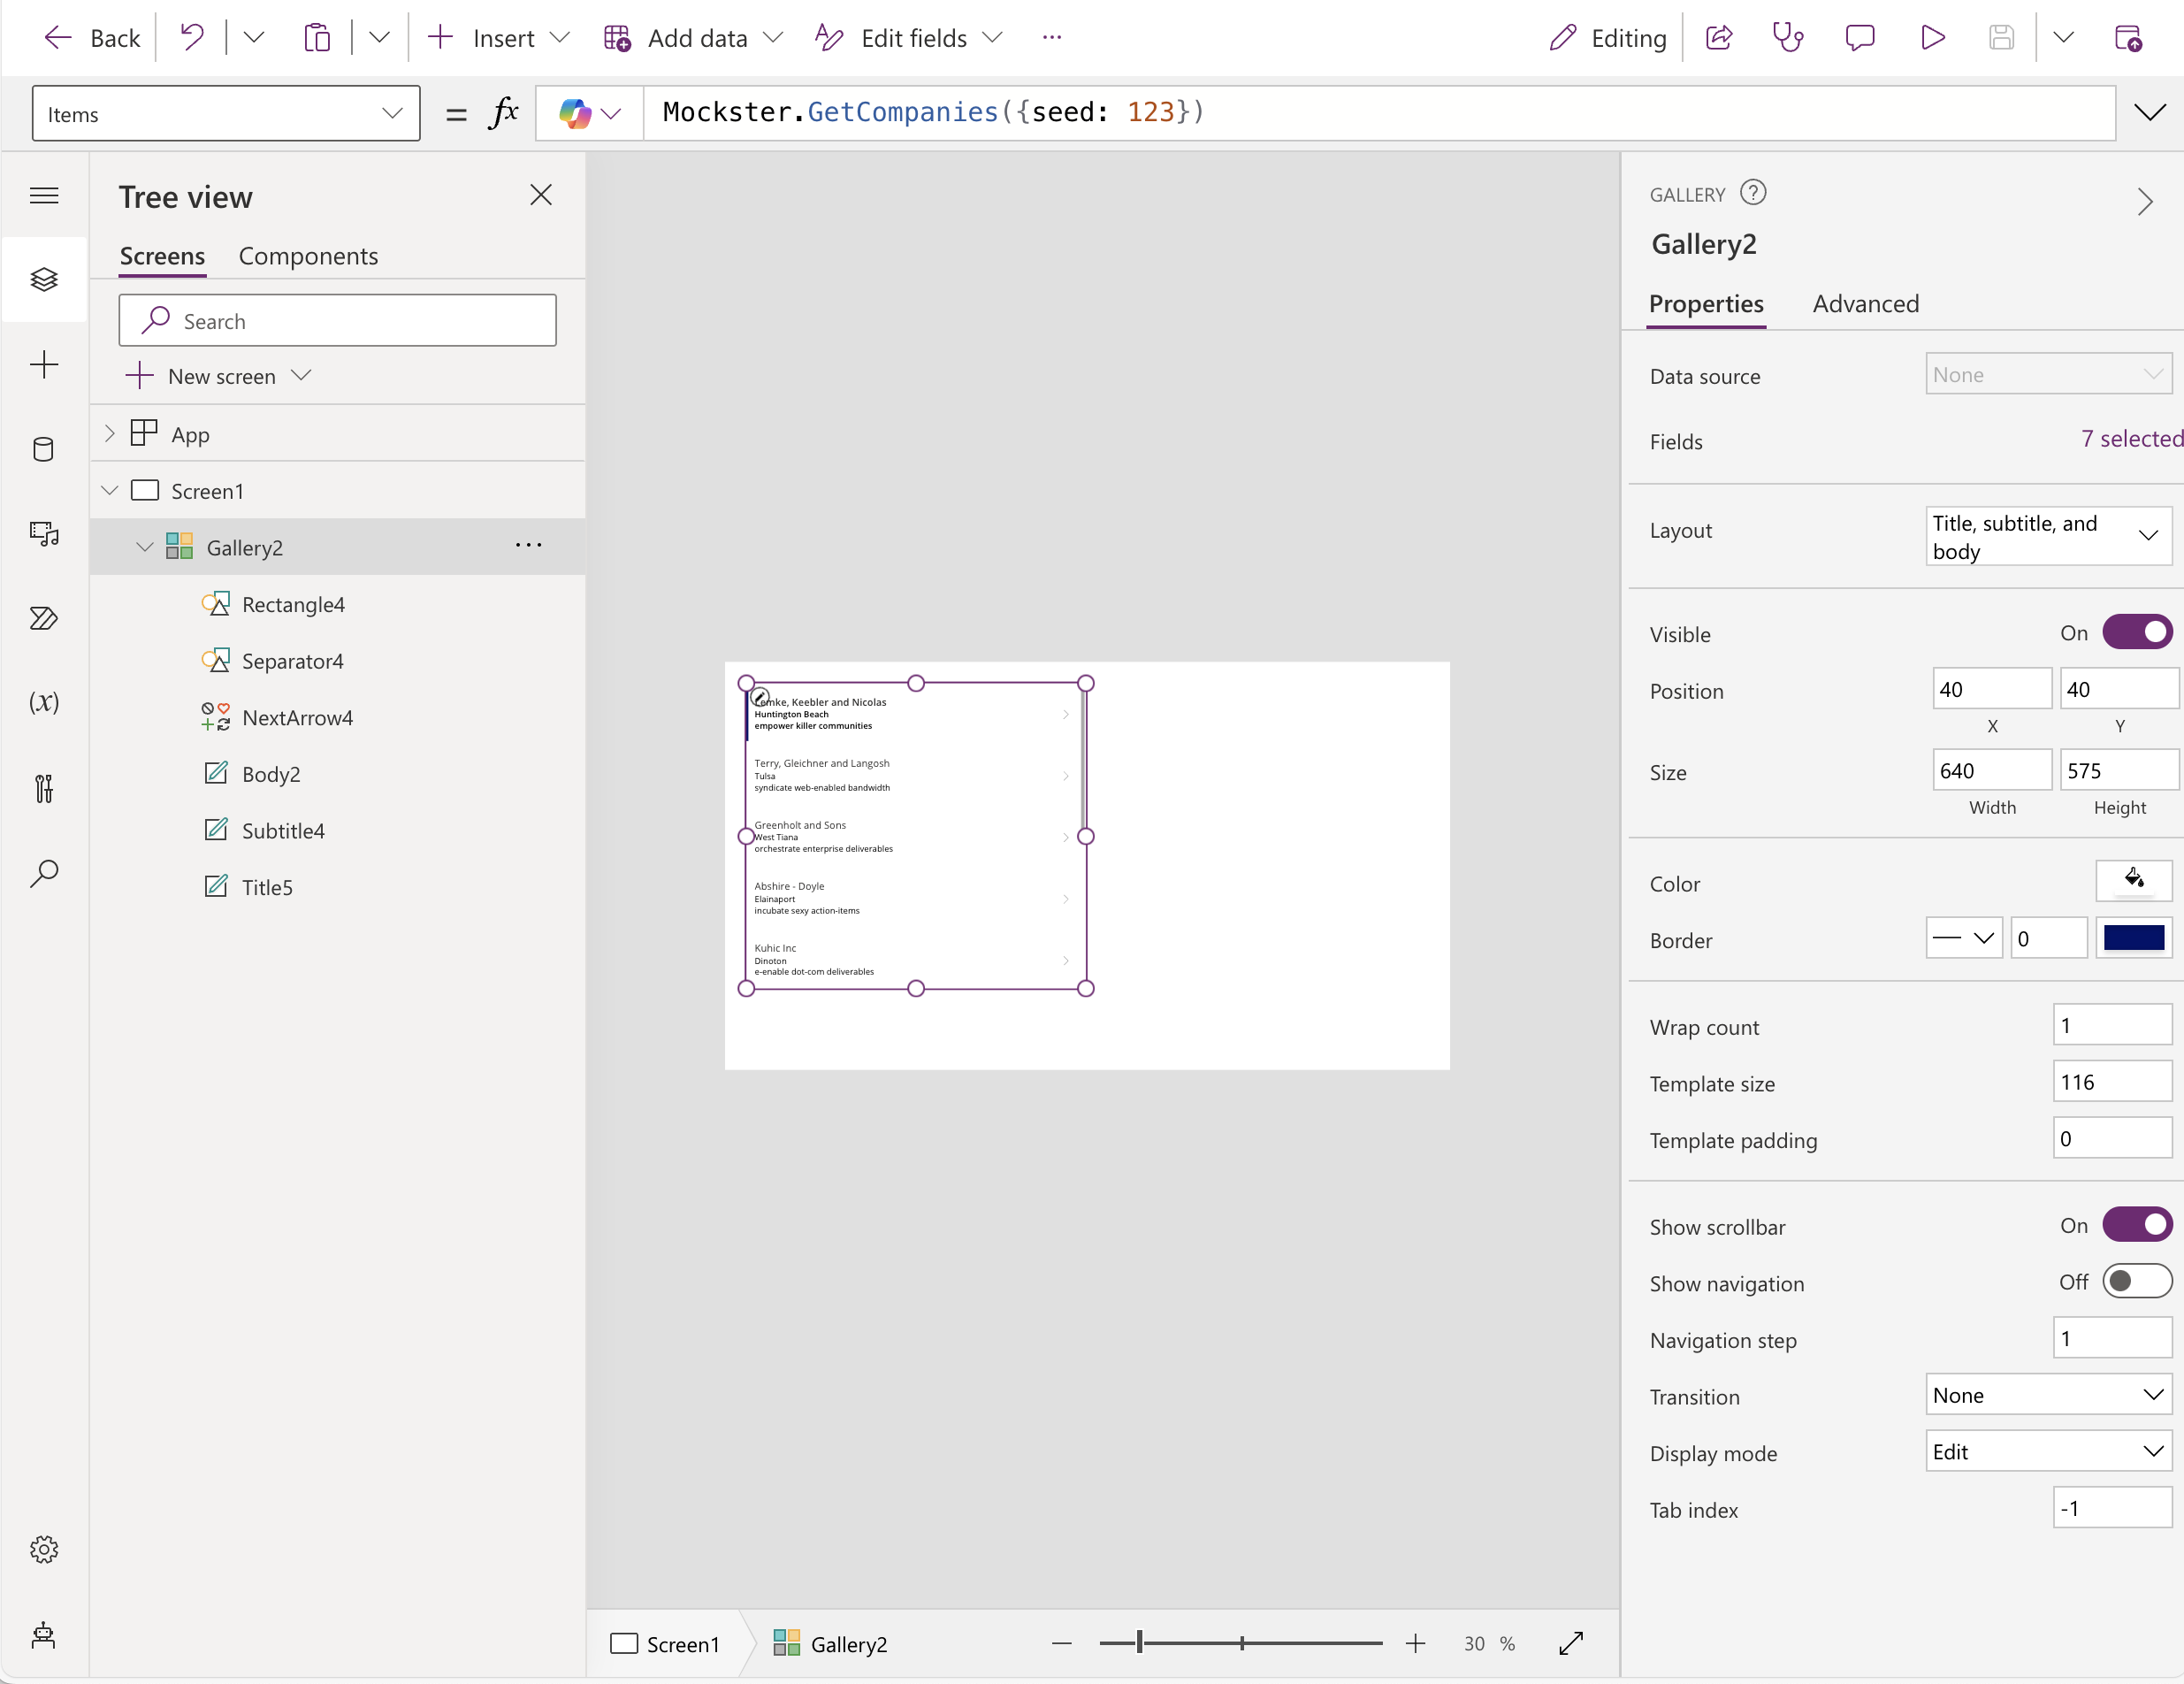
Congratulations, now you have some data to create your UI with. Note that the data used this way is not persisted, and refreshes every time you the gallery refreshes. You can also use the seed property in Mockster, to get the same data every time. Just replace items property with Mockster.GetCompanies({seed: 123}). You may select what seed value you might like. More information about seeding in Getting started section.